
Level - Beginner
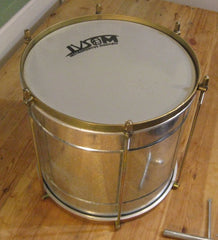
First I want to say I love love love this little steel drum! I had always played aluminum shell repiniques and just recently started playing a steel repinique. I freaking LOVE it!!! Yes, it's a little heavier, but not by a noticeable amount to me. And when you tap the shell WOOO! I love the ringy-ding you get!!! OK, enough about that.
How I Change the Heads on my Repinique.
 In this article I’ll walk you through how I replace a repinique drum head. Step by step from removing old heads, putting on the new one, choosing new heads and tuning your drum. I’ll even tell you how to give your instrument a little extra TLC.
I changed my first drum head my freshman year of high school when I was in the marching band. Samba drums are a bit different construction, but the principals are essentially the same.
So, here you are. You recently bought your first repinique and you’ve been playing it for a while and the head broke. Or maybe you had an unfortunate incident with your drum and popped the head. Or maybe your buddy told you about a style of drum head that they really love and you wanna try it. You've come to the right place!
What you will need:
Drum key
New heads
Small container to hold nuts and washers
Damp cloth
Machine oil, bees wax, or lug grease
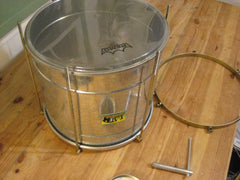
Removing old heads
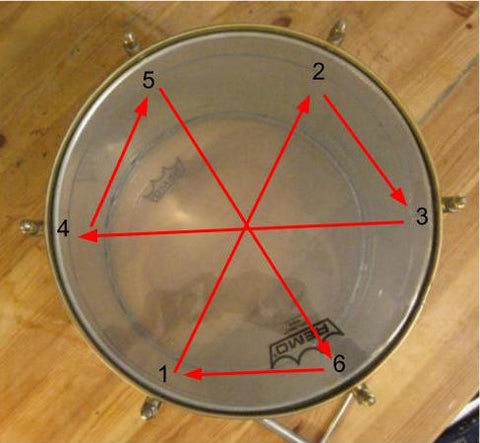
Take your drum key and loosen the nuts from the tension rods. Righty tighty, lefty loosey. No, nuts and bolts don’t go the other way south of the Equator. Do this in a “star pattern”, see the insert and photo below. It really looks more like "Warning Radiation sign" but everybody calls it the star pattern. Using this technique makes sure that you loosen the rim in a way to prevent accidentally bending it or causing weird stress on one side of your drum and warping things.

After you’ve gone around one time, go around again. Keep going around and loosening a little bit at at time until you feel the nuts coming loose. At that point loosen them all with your fingers, remove the nuts and washers and set aside. I recommend a little baggie or small dish, something so you don’t lose them.
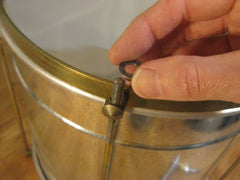
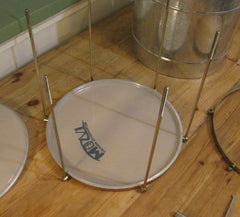
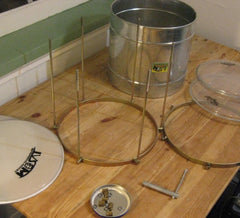
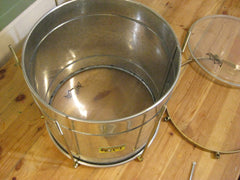
Remove the top rim. Depending on which brand of drum you have the tension rods will flop all over the place or if you have an IVSOM (because IVSOM is awesome) they’ll remain upright. Pick up the shell and remove the bottom head.

Everyone with me?
Yes?
OK
TLC
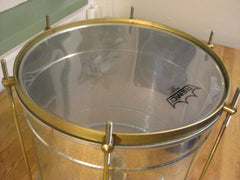
Use a damp cloth and wipe everything down. Especially the shell and rims where they contact the heads. A lot of stuff can build up in there. You might be surprised at what you find in there. My repinique always had a bunch of drumstick dandruff in there. If you play the North Country Fair in Arcata you’ll have a bunch of sand in there from beach parties. If you go to California Brazil Camp you’ll have a lot of dust and redwood needles in there. If you have a dog or cat you know there’s pet hair up in there.
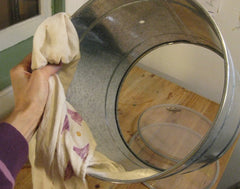 Just take the opportunity to clean while you have all those bits exposed.
Pro tip: I will also check the weld seams for metal burrs and nicks and things. These drums from Brazil are made in tiny factories. And a lot of the fabrication is by hand so every once in a while you’ll find a teeny burr or wrinkle. These can be smoothed out with a little piece of sandpaper or gentle tap of a hammer. This can help you get a little more life out of your new head.
Use a little machine oil on your nuts and tension rods. You only need machine oil on the tips of the rods where the nuts fit on. If you don’t have machine oil it’s not a huge deal but it does keep your instrument lasting longer and allows the nuts to go on smoother. Drum shops sell special grease for this if you wanna go that route.
Choosing the new heads
Are you super confused by which heads to use? In Brazil for caixas and repiniques the heads are generally single ply 5 mil thickness, which is very thin. Surdos can vary a lot. Much of the time in Brazil they use goat skin heads, or plastic heads. The goat skin require more maintenance but sounds amazing!
I’ll have a future post about this topic but here is a quick run down of my personal preferences. I encourage you to ask others what they like and try lots of new things.
Repiniques - Brazilian heads Timbra brand or IVSOM.
Big Surdos - For outdoor loud playing goat skin heads, or inverted napa heads. For mostly indoor playing, I like napa heads (for sale in my store). Or you can take a cheap-o head and put some naugahyde from a fabric store over it.
Caixas - Super thin heads from Brazil Timbra brand or IVSOM, or remo diplomats clear.
Tamborim - Heads from Brazil, find them here.
What heads to you like to use? Leave it in the comments below. I wanna know!!!
Once you've made your decision it’s time to put on the new heads.
Putting on the new heads
You should have two rims, one with tension rods in it and one without. Put your rim with tension rods in it, down on the table first. Then fit your shiny new head into the rim and set the shell down on the head.
Put the second shiny new head on top of the shell. Take your other rim and thread the tension rods through the holes in the rim and
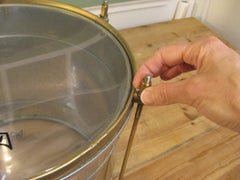
Feed the tension rods through the holes in the rim and put on the greasy nuts until they are looser than finger tight. Be careful not to cross thread them, if they’re going on kinda stiff, use machine oil, and try a different tension rod. Use your damp cloth again and wipe of the excess grease so that it doesn’t get on your clothes, carpet, drum bag etc.
Important, if you are not using an IVSOM drum line up the tension rods so that they are straight up and down before you tighten the nuts down. Like trying to hang a picture straight on a wall, you need to look at it from across the room to really tell if they are straight. When you know it’s straight, tighten the nuts to finger tight.
Seat the head?
Some people do this thing where they push on the drum head super hard, like giving it CPR, to “seat the head”. This supposedly cracks the glue, makes it tune better, and hold the tuning for longer. I’ve tried both ways and don’t notice a difference. I think seating the head was something that was necessary for drummers back in the 60s and has held over until today. Drum heads, plastics, and glue are so much more advanced than they were that this is not necessary. I have heard that with some higher end heads with tiny air vents and internal muffling etc. that you can actually damage the head doing this.
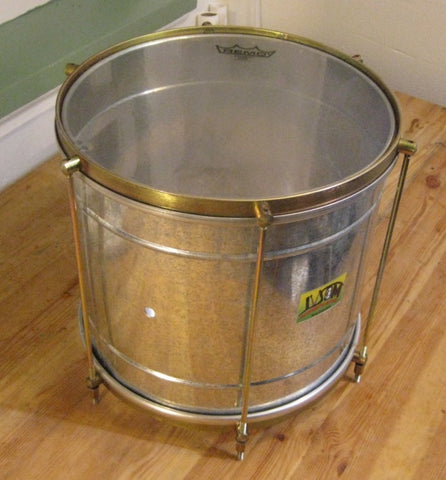
Tuning
 At this point, with your tension rods straight, and your washers and nuts on there finger tight, take a drumstick and tap the head by every rod. If one is a little lower than the others give it a 1/8th of a turn and see if you can get them all to a similar pitch. You’ll hear two tones, a lower tone and a higher pitched overtone. Just work with the lower tone. Some people lightly press a finger in the middle of the head while doing this to eliminate most of that overtone sound.
There are fancy tools called tension watches, and torque wrench keys to make sure you have the exact tone and tension. But this is WAY overkill in my opinion. Maybe if your Dave Weckl (I know you read this Dave Weckl) and recording a lot you might need a tool like this.
Once the tones at every tension rod are all more or less similar, go around the drum in the star pattern again. I do a full turn of the drum key for the first pass or two. As you start to feel it tighten up reduce to ½ turns. To prevent the rim from warping you need to do the same tension all the way around for every nut. Then I will now test hit the drum to see where I’m at. If it’s still pretty low I go around for a ½ turn again. When I get close I reduce the drum key turns to like a ¼ turn or less. And I tap around the drum again to see if it’s still more or less the same pitch.
Every drum has a pitch at which it really sings. Play around, see if you can find a pitch you like. As the head stretches out over time the pitch will drop and you'll need to tighten it up a little. I usually just do a 1/8 turn all the way around the drum.
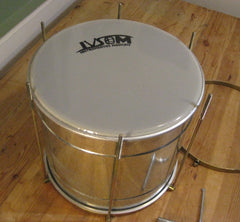
When you first put on a new head the rim will be pretty tall and stand up above the head. And the head will sound a little weirdly high pitched. Some people describe this as whiny. Over time and each time you tune the rim will start to come down to the level of the drum head, and the head will start to sound nicer.
Big temperature changes will make your drum head stretch faster. Try not to leave your drum in the car in the hot summer or cold winter.
For surdos it’s a little different because you want to tune them to each other in intervals. Future post coming about tuning surdos with each other.
Conclusion
Do what it takes to take good care of your instrument and it will take good care of you.
Now you’ve got your new drum heads all tuned up and ready to play. Go forth and annoy your neighbors!!!
What heads to you like to use? Got any other tips? Let me and the rest of the world know in the comment section below.
Hi there,
I’m about to build my first Ripinique and wondered what drum heads to buy, I understand that top and bottom are different ones, right? the bottom should be cheaper. I see that in my country they sell Remo heads, do you have a recommendations on which ones to buy? I’m also open for buying online from around the world.
Thanks a-lot for any help.
Tal.
Hello Sarah!
IVSOM makes their rims so that the rods are friction-fit by screwing them tightly into the threaded lugs on one rim. When removing the other rim sometimes it gets stuck. You can tap it gently with a hammer or rubber mallet in the intended “direction of travel” :D and it should come off. I hope this explanation makes sense! Best, Courtney
Repinique newbie-playing for just over a year and never changed the heads…this is a fab guide but on trying to lift off the top rim one of the tension rods seems wedged in place. Help! Love my Ivsom and don’t want to break it forcing things…any advice? Anyone?
Leave a comment